Use slazzer remove bg for cleaner image edges
Slazzer remove bg helps separate a foreground subject from its original surroundings so you can review the cutout before using it in a product image, portrait, listing, or campaign.
A direct route to a cleaner cutout
The background-removal path is useful when the subject matters more than the original setting. These related pages cover the broader tool, adjacent editing, and app surfaces.
Three mechanisms behind a clean cutout
A dependable removal workflow is less about pressing one button and more about checking the subject, the boundary, and the intended use.
-
1
Identify the foreground
Start with the object, person, or product that must remain. Clear subject-background contrast usually gives the removal process a simpler visual decision.
-
2
Separate the surrounding field
The tool works toward isolating the foreground from its original scene. Look closely at hair, thin objects, soft fabric, and low-contrast edges rather than judging only the center.
-
3
Inspect before reuse
Review the result against a contrasting background and check that important details were not trimmed away. Then place the cutout into the next design or listing.
How the removal workflow fits together
This comparison shows where an automated cutout helps and where a human review still adds value.
Automatic removal
Manual cleanup
Primary job
Automatic removal
Separates the likely subject from the original background
Manual cleanup
Corrects missed or unwanted areas by hand
Best starting point
Automatic removal
A clearly visible subject with a distinct outline
Manual cleanup
A difficult image with overlapping or ambiguous regions
Speed of first result
Automatic removal
Produces an initial cutout quickly
Manual cleanup
Requires deliberate selection and edge work
Fine edge control
Automatic removal
May need inspection around hair, fur, glass, or thin parts
Manual cleanup
Offers closer control when the boundary is complex
Background replacement
Automatic removal
Creates a separated subject ready for another setting
Manual cleanup
Can refine the separation before compositing
Final responsibility
Automatic removal
Review the output before publishing or exporting
Manual cleanup
Review the output after every manual adjustment
Limits and edges
Background removal is useful, but it is not the same as complete photo retouching. These caveats help set the right expectation for the route.
-
Complex edges can need review
Hair, fur, lace, transparent objects, and fine wires can blend into the original background.
WorkaroundInspect the perimeter against both light and dark colors before reuse.
-
Similar colors can confuse separation
A subject that closely matches its surroundings may not have a visibly decisive boundary.
WorkaroundUse a clearer source image or plan a manual cleanup pass for low-contrast areas.
-
It does not rebuild missing detail
Removing a background cannot restore parts of a subject that were already hidden, cropped, or out of focus.
WorkaroundChoose the strongest source photo and retake the image when essential details are absent.
-
A cutout is not a finished composition
The result still needs context, scale, spacing, and color decisions in the design where it will appear.
WorkaroundPlace the isolated subject into its final layout and check the complete visual there.
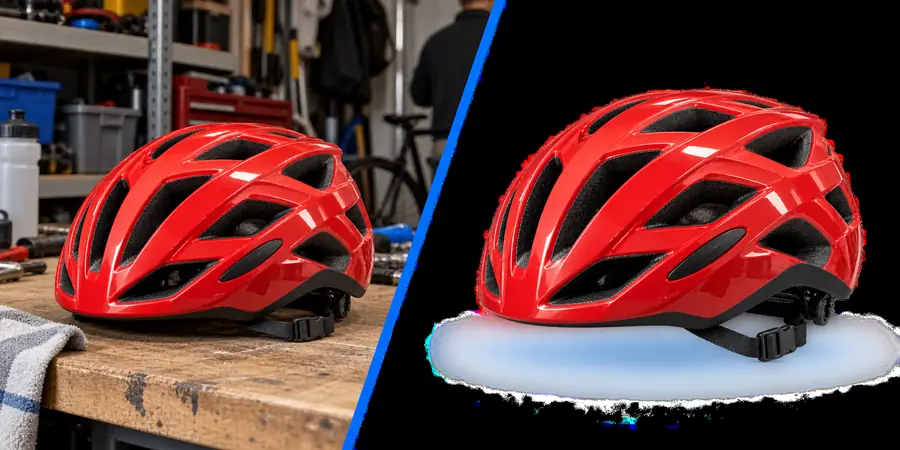
Before and after the cutout
The useful change is not simply a different color behind the subject. It is the shift from a fixed scene to an isolated visual that can be reused in another context.
- Original background
- Removed background
Check fine edges before placing the cutout into a new design.

Three checks before you reuse the result
Treat these as practical review points rather than promises about every image. The right check depends on the subject and the background it came from.
- 1 Confirm the complete subject is still present
- 01 check
- 2 Inspect hair, fur, thin parts, and soft edges
- 02 check
- 3 Preview the cutout in its final visual context
- 03 check
Move from removal to the next visual
When the subject is separated cleanly, it becomes easier to test a new layout, product presentation, portrait treatment, or campaign direction. Start with the image you want to clean up, then review the edges before you publish or share the result.
Remove an image background- Start with a clear source image
- Inspect the boundary around the subject
- Use the cutout in its intended design
Questions about slazzer remove bg
Slazzer remove bg is used to separate a visible subject from the background of an image. The resulting cutout can then be reviewed and placed into another visual context.
Images with a clearly visible subject and reasonable contrast against the surroundings are the easiest starting point. Busy scenes, similar colors, and fine or transparent edges usually deserve a closer review.
Hair and fur can be challenging because their fine strands blend into the surrounding scene. Inspect those edges against a contrasting background and plan a cleanup pass if the boundary is not suitable.
The main purpose of this route is separating the subject from its background, not completing every retouching or design task. After removal, you may still need to adjust layout, color, scale, or context.